Learn how to build N Scale, OO ,HO, and TT scale models here. Follow these fully explained and illustrated steps here.
What Is A Study Model?
It is a model that architects make when designing a building. It is as near complete as possible. They check everything about he model from the building itself to how the sun shines in the windows when it is in place on the landscape.
I always make a full sized mock up to check it in the landscape. Then I make one or two sides and test different trims, weathering, the window sizes, etc. I finish it is a lot of detail.
Changes can be made and final ideas put in place before I go for a full build.
It is a practice build.
Building The Final Carton Model.
Carton Models are versatile, simple to assemble and inexpensive. Making models with them is perfect for beginners and experts alike.
The best way to learn how to make a model is to make a study model. Once you have completed this as a study model, you will know the basics and can move on from there.
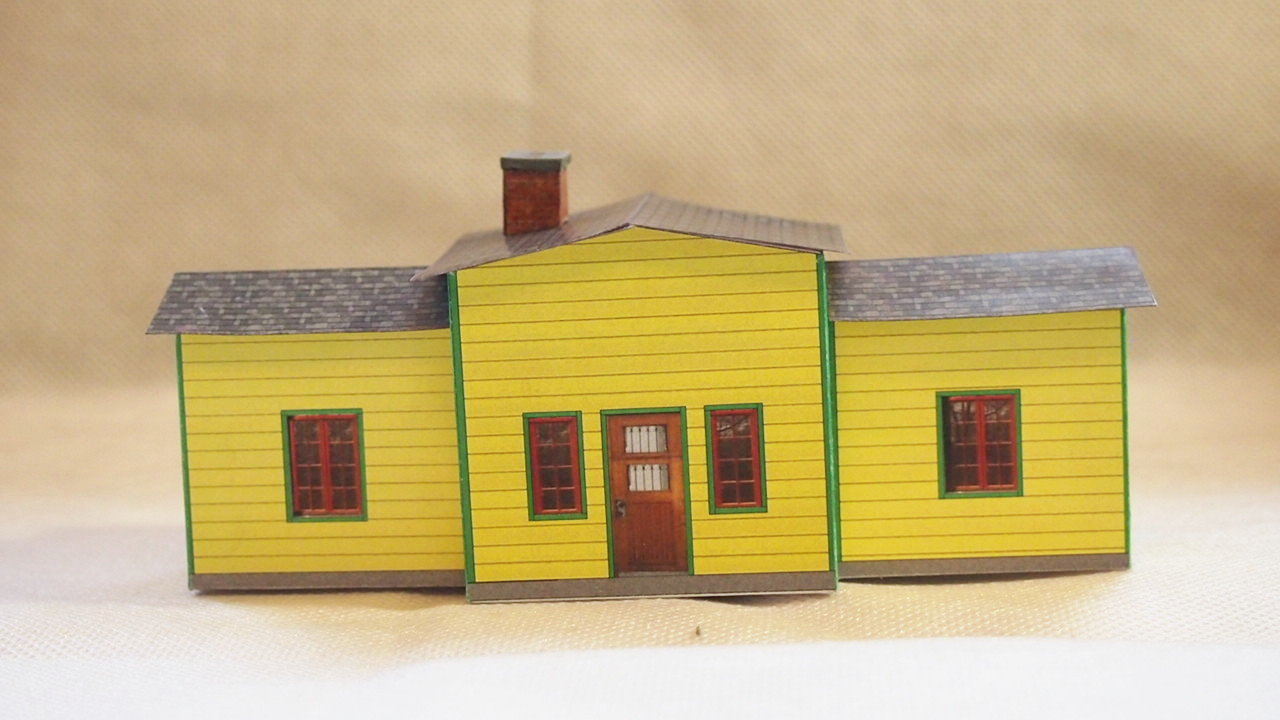
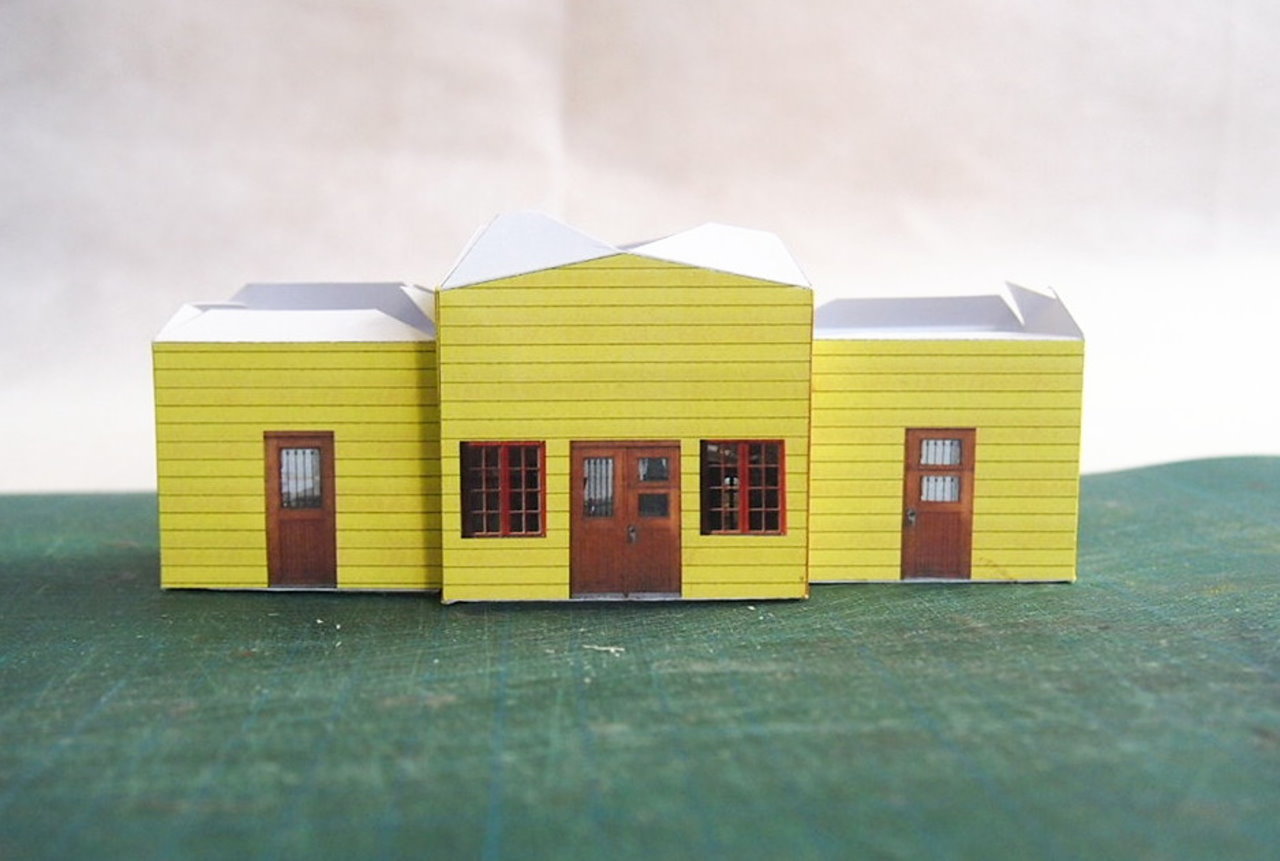
Tot the left is an image of the model we will build. Using this as a base, you can light the interior, add exterior lights, add signs, benches, people and furniture, etc. etc. etc.
To help you with that, you can download the free plan that we use in this tutorial and then build it following the steps in this tutorial.
Materials Required
Model Plan
The model that you download consists of the plan, in.pdf format, with a building that is presented in ho scale – 1 to 87. You can make that building in that scale or in any scale smaller than that by adjusting your printer settings. See Printing To Scale.
Download the plan here.
Paper And/Or Card
In the smaller scales, building the model on 200 or 220 GSM paper is more than satisfactory.
In this tutorial, we use card cut from a box that came from our favorite bakery filled with a great chocolate cake. Something similar, like a cereal box, gives added strength.
In N scale if you wish added strength so that you can do extra detailing .5 mm card is best.
Do note that each plan that we provide tells you for what paper or card the plan requires for best results.
Scissors
Scissors are fast, accurate and safe. I am a scratchbuilder. My tool drawer has 8 different scissors and 4 different snips.
Of course I have my share of hobby knives scalpels and razor blades. They are necessary to cut out windows and doors when I want a 3D effect or lighting. But scissors are my preferred tool.
Scribe
A nail, empty ball point pen (MAKE DOUBLE SUrE IT IS EMPTY), engineers scribe, back of a knife.
I insert a small nail in a chopstick, glue it in place and make the tip smooth by rubbing with fine emery paper.
Straight Edge
Any ruler or anything else that is straight will do.
Glue
Office paste glue or any white glue is fine.
Pase glue is the ONLY thing to use to attach the print to card.
I use several glues.
For white glue I use one sold under the trade name VICOL. It dries clear and quickly. Modelers in Poland swear by it.
I also use Fast Tack and Tacky Glue.
And then in the collection there is always a stick of office glue.
Making The Model
So let’s start.
First, test your glues. Use them to glue some scrap paper to card and paper to paper. Learn the characteristics of the particular glues that you will use.
Try cleaning the glues off your fingers, workspace and tools. Know what you may face. Be prepared.
Vinegar is a great cleaning agent. I keep a small jaer of it on my work bench when using glue. Cleans tools and fingers alike.
Print the model plan in the scale that you wish.
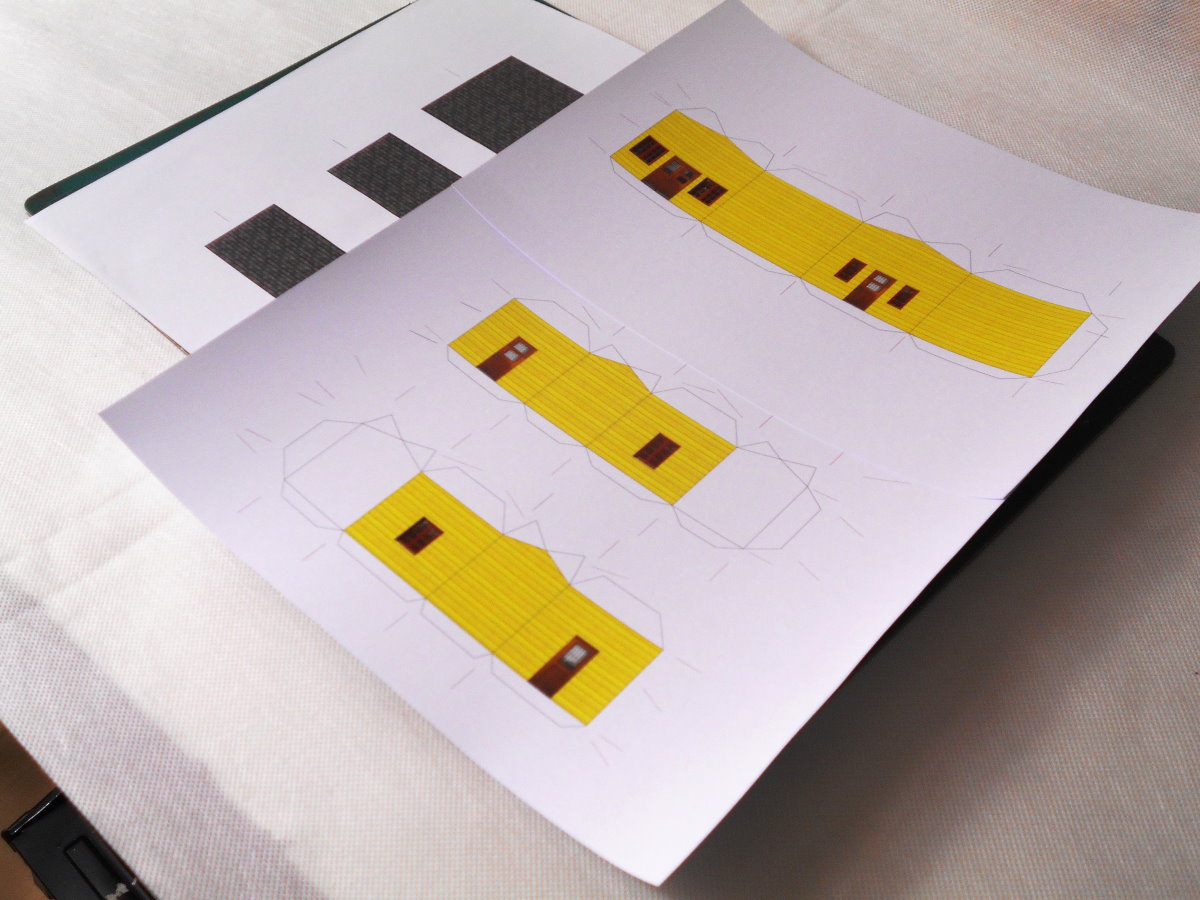
Lay the plan out on the table and get familiar with what is on the plan. This plan was printed on 200 GSM paper and that is what we use in this tutorial.
 Note the red lines around the plan. They indicate where you should fold your model. And they are guides that you use to place your straight edge accurately to score the folds.

Score each of the folds. More information about scoring can be found at this link. How To Score A Carton Model.

Use your scissors to cut out the model.
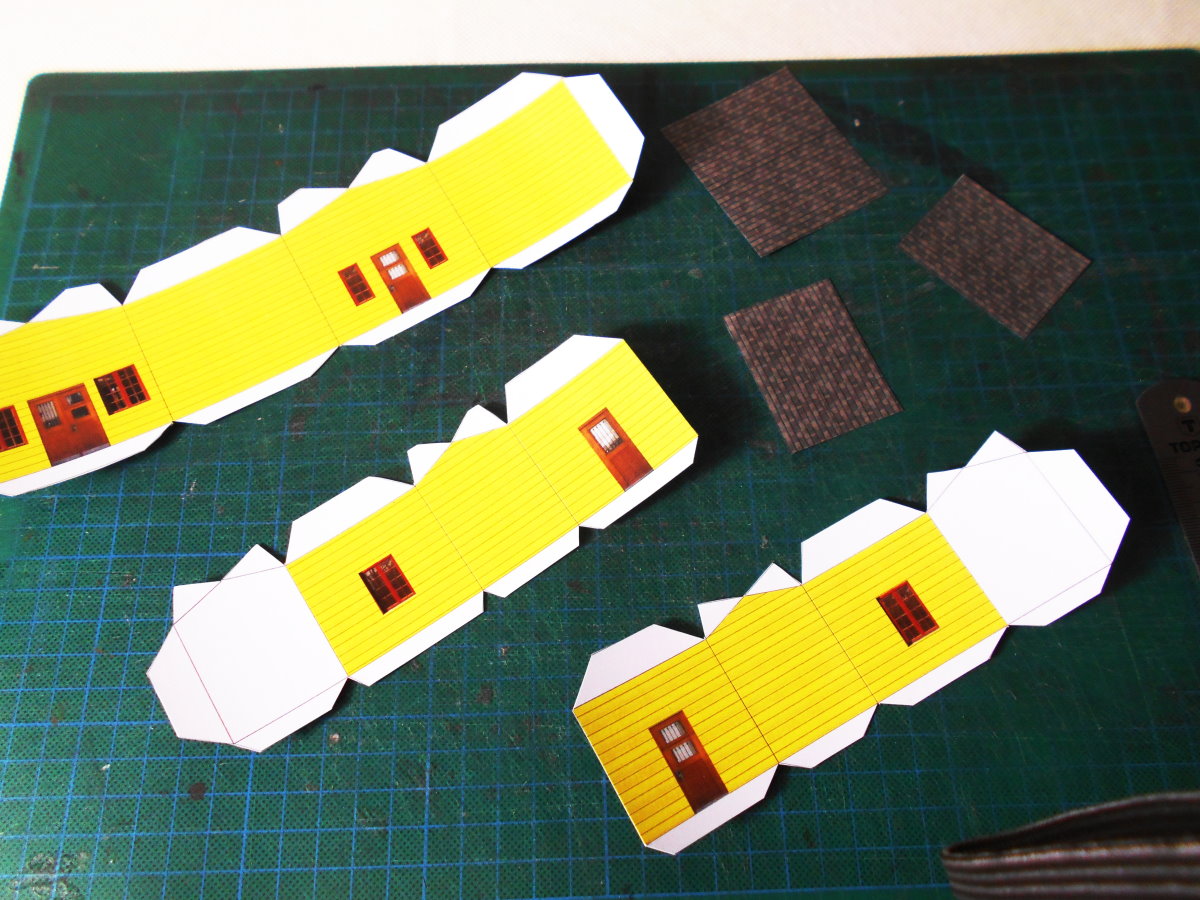
Here are the model parts cut out and ready to fold.
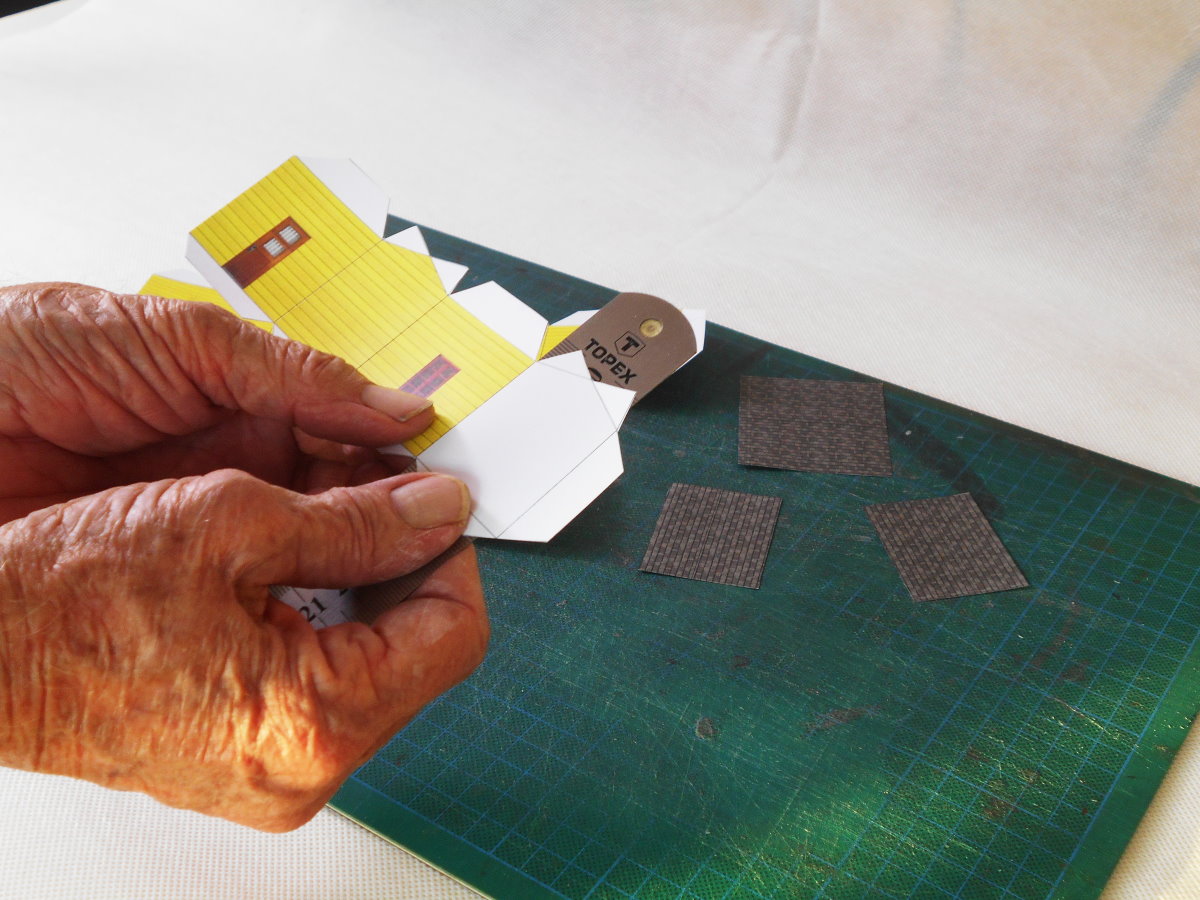
Place your straight edge on each of the fold lines and fold to get a sharp corner.

After folding

With a pencil, or chalk, color those areas that show white in the fold areas. Also, darken the inside edge of side building tabs so when you glue the sections the white on the tabs will not show.
Be careful when using felt tip markers. Some will bleed though the card and ruin the graphics. Test yours on a piece of scrap before you use it.
Important Notes
There are three types of tabs. The bottom tabs keep the walls straight. The top tabs are used to attach the roof. The tabs on the left and right side of the walls are used to attach the pieces of walls together.
A cardinal rule of modeling : Check 3 times before you glue. This helps you avoid gluing things in the wrong place, upside down, backwards, etch.
 Apply glue to one of the wall tabs and join the pieces.
Hold or clamp the joint until it sets. If you use a fast drying glue like Vicol or Tacky glue., you only have to allow about five minutes drying time.
Note that I keep glue in a used eyedropper bottle. That allows me to add minimal dots of glue just where I want it.
 Corner Gussets
We will add corner gussets to square the walls.
Cut some right angles out of thick card.
 Glue all the pieces and add corner gussets as you go.
Make sure that you glue so the building stands flat on the table.
 The modules are now ready to join.
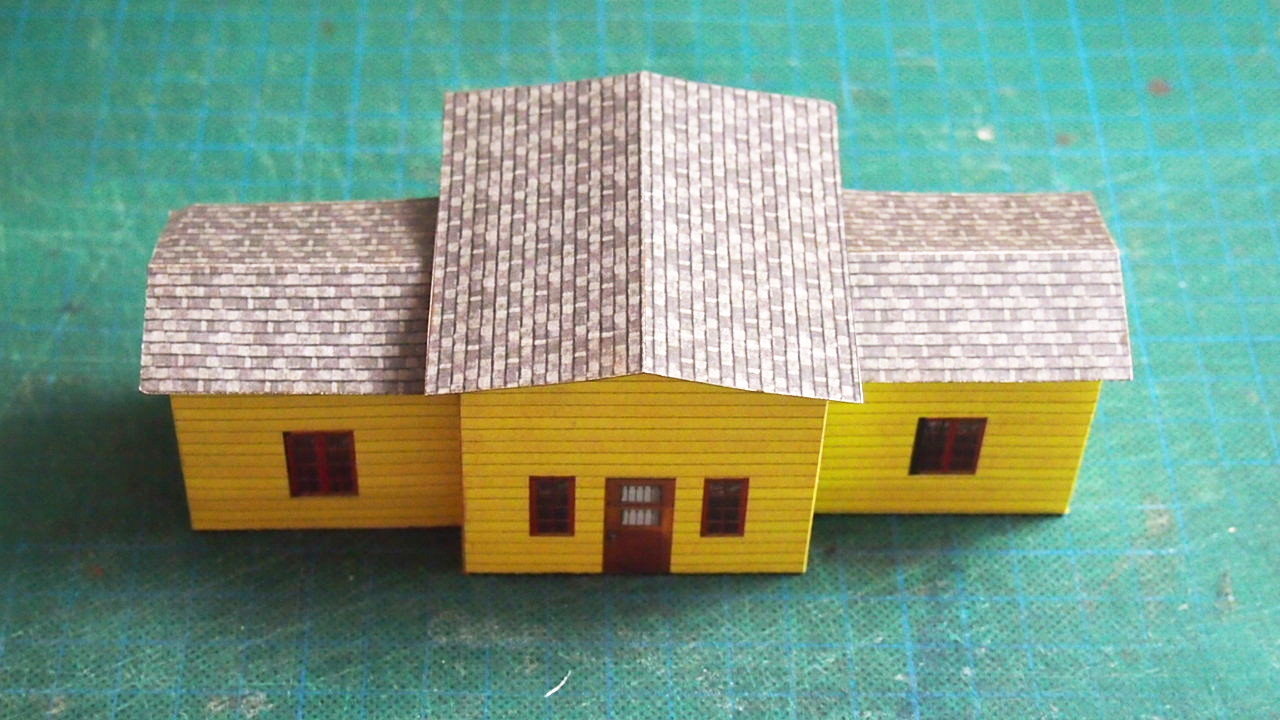
 The building is now ready for the roofs.
Test fit the roofs. Depending on how accurate you cut and joined the modules you may have to trim a roof or two to make it look right.
 Darken the edges and underside of the roof edges so white does not show. It is best to use a crayon or pastel. Felt tip pens may bleed through the paper/card and ruin the appearance of the top of the roof.
To add the roof, each of the side roof tabs will be glued in succession. The wall roof tabs will be glued last.
Bend the side roof tabs up so that when you put the roof on the model, the roof makes contact with the tab.
With the building base flat on the table, line up the roof.
Test the fit 3 times before you glue.
Add glue to one tab and hold it in place until the bond is made. A fast drying glue such as Vicol or Tacky Glue is best here. The bond will be made in less than a minute. 5 to dry.
Then glue the remaining tabs.
 Add the chimney.
Remember that we have just assembled a simple version of this building. This is what the actual plan looks like when assembled. Note the foundation, window and edge trim.
Additional Things You Can Do
There is room over the doors on the center module. Add a sign.
Add stoops made of matchsticks or thick card.
Give the building a 3D effect by cutting out the windows and doors. Darken the edges of the cutout area. Print the plan again and cut out the windows leaving a border that you can use to add glue. Glue the new windows and doors on the backside of the walls. You can even cut the doors so that the installed door is open.
Lighted buildings – Cut out the center of the windows and glue clear foil on the back of the walls. Add window mullions by gluing thread behind the clear foil or use the sticky label paper method.
Extend the foundation out from the walls by cutting out the foundation section from another printed copy of the plan and gluing it over the original. Or use card or coffee sticks cut to size.
Add thick black acrylic paint around the base of the chimneys to simulate tar.
Cover the roof with tissue or emery paper (tar paper or asphalt roof), peeled corrugated cardboard for a ceramic or asbestos roof, scribed thick aluminum foil (aluminum roof), or strips of scribed veneer for wood shingles.
Add roof frames by gluing matchsticks to the underside of the roof overhang.
Add roof fascia by gluing card, matchsticks or cut coffee sticks to the bottom edge of the roof.
Make gutters by shaping thick aluminum foil around a skewer or other round form.
Make gutter downspouts by rolling thick aluminum foil. Paste glue will hold the edges. Or use shrink tube.
Make metal chimneys by rolling thick aluminum foil or use shrink tube.
Cut chimney pipe holes. Blacken the cutouts
Weather with artists pastels or an airbrush.
Glue to a base and surround with trees, furniture and figures.
If you have questions, comments or need help, contact us by clicking here.